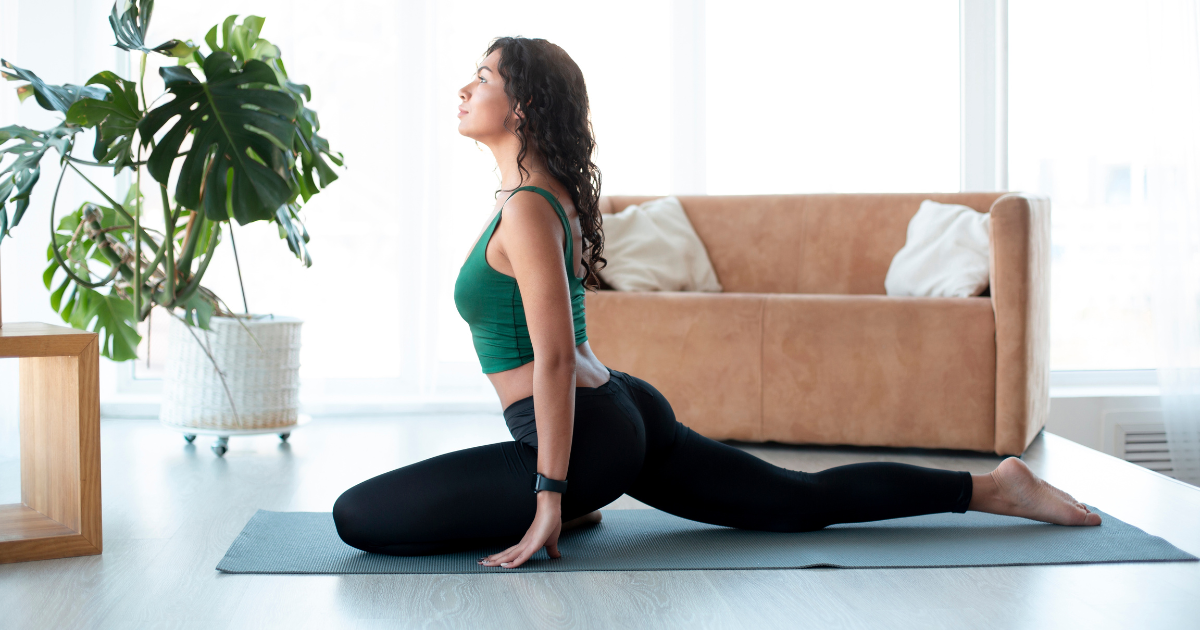
Pigeon Pose (Eka Pada Rajakapotasana) is a yoga pose known for its ability to stretch and open the hips. It might seem challenging for beginners at first, but it's a journey worth embarking on for the flexibility and openness it brings to your lower body.
Though Pigeon Pose can be a great way to increase flexibility and stretch your muscles, performing the move correctly is important to prevent injury or strain.
This article tells you everything you need to know about Pigeon Pose—including step-by-step instructions, benefits of doing it, and tips on making it your daily practice regardless of your level.
Benefits of Pigeon Pose
Pigeon Pose is great for combating the stiffness and pain associated with sitting for long periods. Targeting the psoas and other hip flexors, often neglected in other seated postures, directly addresses the tightness in our hips. This pose not only stretches your hips but also aids in increasing hip mobility, making it easier for you to move your legs freely within the hip socket without discomfort or restriction.
Regular practice of Pigeon Pose can significantly enhance your flexibility and overall well-being. It's particularly beneficial for those who find themselves confined to a desk or chair for most of the day, as it effectively counters the negative effects of prolonged sitting by stretching the muscles and tissues that are typically underused and tightened during such activities.
Step-by-step instructions
- Start in a Tabletop Pose on your yoga mat, with your wrists under your shoulders and your knees under your hips.
- Take a moment to find stability and alignment in your tabletop position, ensuring your spine is neutral.
- Slide your right knee forward toward your right wrist. The right foot will come toward the left side of the mat.
- Extend your left leg back behind you, keeping the hips square.
- Check the alignment of your front knee. The right shin may not be parallel to the front edge of the mat, and that's okay. Adjust the angle of the front leg to find a comfortable position.
- Aim to have your right shin at a roughly 45-degree angle from your torso. Flex your right foot to protect your knee.
- Ensure your hips are square to the front edge of your mat. If your hips are uneven, consider placing a yoga block or folded blanket under your right hip to support and stabilize it.
- Inhale deeply, lengthening your spine. Imagine your chest lifting and your tailbone tucking slightly.
- Exhale as you begin to walk your hands forward, lowering your torso toward the mat.
- Find a comfortable position for your upper body and allow yourself to relax into the pose.
- Close your eyes if it feels comfortable, and focus on your breath. Take slow, deep breaths, releasing any tension in your hips with each exhale.
- Hold the pose for 5-10 breaths, or longer if it feels good for your body. Listen to your body and adjust as needed.
- As you hold the pose, try to soften any areas of tension you may be holding in your body, particularly in the hips and lower back.
- To exit the pose, gently walk your hands back, lifting your chest. Press into your hands as you slide your right knee back to meet your left knee in Tabletop Pose.
- Take a moment to notice the effects of Pigeon Pose on your body before repeating the sequence on the other side.
Common mistakes
One common mistake in Pigeon Pose is transitioning from a Tabletop or Downward Dog directly into the pose without proper alignment, which can lead to potential hip pain or discomfort. Another frequent issue is the improper distribution of weight, which can put unnecessary strain on the knees or hips, detracting from the pose's effectiveness and potentially causing injury.
To avoid these pitfalls, focus on maintaining even weight distribution and alignment. Ensure your hips are squared to the front of the mat, and avoid rushing into the pose without proper preparation. Adjusting your position as needed and moving mindfully can help mitigate the risk of discomfort or injury.
How to prepare
Preparing your body for Pigeon Pose is crucial, especially if you have tight hips. Begin with gentle stretches that target these areas, such as the Figure 4 Pose. Lie on your back with your knees bent and cross your right ankle over the opposite thigh. Gently pull your left thigh towards you, feeling the stretch in your right hip. Take a few deep breaths and repeat on the other side to evenly prepare both hips for the deeper stretch of Pigeon Pose.
Warming up your body with a series of dynamic movements can also help. Engage in light activities that increase your heart rate and blood flow to the muscles, ensuring they are more pliable and ready for the deep stretches ahead. This preparatory work can significantly improve your ability to perform Pigeon Pose safely and comfortably.
Modifications and variations
Is the Pigeon Pose too challenging or easy for you? You can modify and vary it to suit your body and skill level. Work on getting a deeper stretch or keeping it more modest—whatever works best for you.
Seated Pigeon Pose

Image source: Yoga Journal
Seated Pigeon Pose offers a more accessible option for those looking to stretch their hips without the intensity of the traditional pose.
How-to: Sitting on a chair or the floor, cross one leg over the other at the knee, flexing the foot to protect the joint. Gently lean forward, keeping your back straight, to deepen your hip and glute stretch.
This variation is perfect for beginners or anyone with knee concerns.
King Pigeon Pose

Image source: Lessons.com
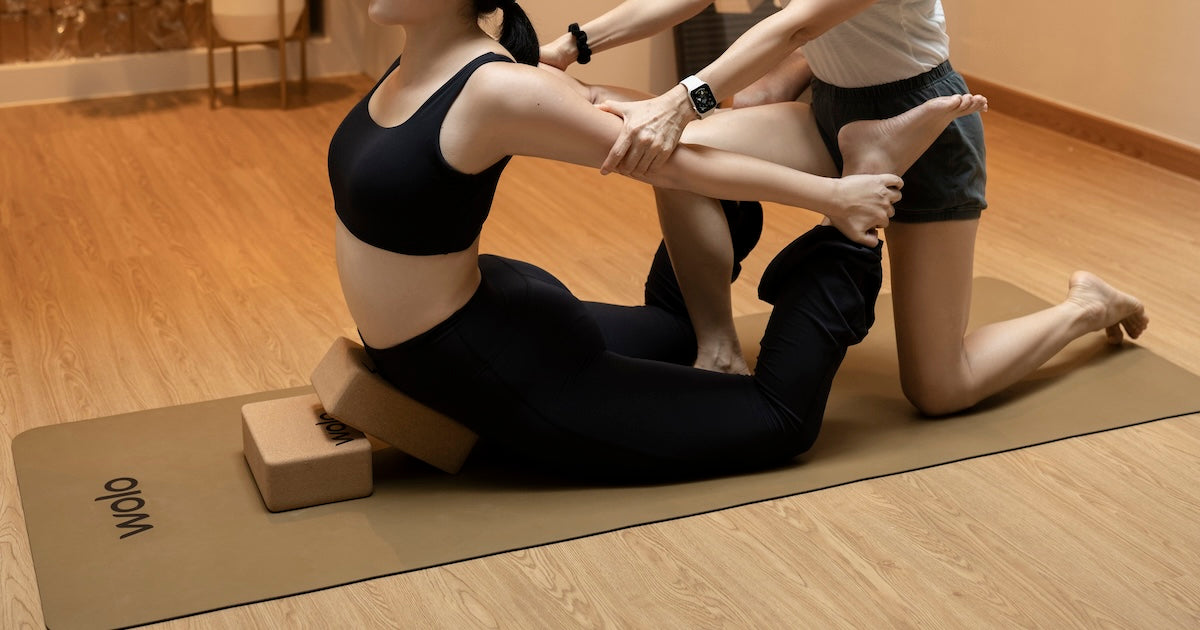
King Pigeon Pose is an advanced variation that requires more flexibility and balance.
How to: From the basic pigeon pose, bend your left knee and reach back with your left hand to grab your left foot, drawing it towards your body for a deeper stretch.
This variation stretches the hips, thighs, and abdomen, making it a comprehensive posture for experienced practitioners seeking a challenge. Use a yoga strap to gradually progressing into the pose.
Flying Pigeon Pose

Image source: The Yoga Collective
Flying Pigeon Pose combines balance and strength, taking the traditional pigeon pose to an advanced level.
How-to: Begin in a squat, placing your hands on the ground in front of you. Place your right shin on your triceps, near the elbow, and carefully shift your weight forward. Lift your feet off the ground, balancing on your hands.
This pose requires focus, strength, and control, offering a dynamic challenge for those looking to advance their practice.
Risks of Pigeon Pose
Pigeon Pose, while beneficial, can cause knee and hip strain if not performed correctly. It's crucial to approach the pose cautiously, especially if you have knee or hip issues. Always ensure proper alignment and use modifications or props, like a folded blanket for support, to minimize stress on vulnerable areas.
Start slowly and listen to your body's signals to practice Pigeon Pose safely. If you experience any pain or discomfort, ease out of the pose, consider a gentler variation, or seek guidance from a yoga instructor. With mindful practice and attention to form, Pigeon Pose can be a safe and rewarding part of your yoga routine.
Frequently asked questions
What is the Pigeon Pose good for?
Pigeon Pose is renowned for its ability to deeply stretch the hips, promoting flexibility and relieving tension in the lower body. It's particularly beneficial for those who sit for extended periods, helping counteract the stiffness and discomfort associated with prolonged sitting.
What muscles does Pigeon Pose stretch?
Pigeon Pose stretches the psoas muscle, a key hip flexor, along with other muscles in the hips and lower back. This comprehensive hip flexor stretch is crucial for maintaining flexibility and mobility in the hip region, supporting overall lower body health.
How long can you stay in Pigeon Pose?
The duration in Pigeon Pose can vary based on your comfort and experience level, but starting with one to two minutes on each side is a good guideline. As you become more comfortable, you can gradually increase the time to deepen the stretch and benefits.
Who should avoid Pigeon Pose?
Individuals with severe knee or hip issues should proceed with caution or avoid Pigeon Pose altogether. It's essential to consult with a healthcare provider or a knowledgeable yoga instructor to find suitable yoga poses that won't exacerbate existing conditions.
How to ease into Pigeon Pose as a beginner?
If you're new to yoga and find that you have tight hips, starting with Pigeon Pose might seem daunting. To make it gentler, focus on lifting your upper body and not rushing to bring your hip closer to the floor. This approach reduces the intensity of the stretch, allowing your hip flexibility to increase gradually. Using props like a yoga block or a folded blanket under your hip can also help manage the intensity, making the pose more accessible as you work on your flexibility.
The bottom line
Pigeon Pose is a great yoga practice that serves as a powerful medicine for your body, especially when it comes to stretching and strengthening the outer hips through regular practice. Its beauty lies in the ability to adapt and modify, ensuring that individuals with knee injuries can still engage in this pose by using alternative poses or adjustments, such as supporting themselves on elbows or hands to reduce pressure.
If you're just starting, remember to protect your knee by not forcing the shin to be parallel with the front of the mat. Instead, focus on the external rotation of the hip while keeping your spine long.
With patience and mindful adjustments, such as bending your knees slightly to ease into the pose, Pigeon Pose can enhance your yoga journey and offer a path to improved flexibility and well-being.


