


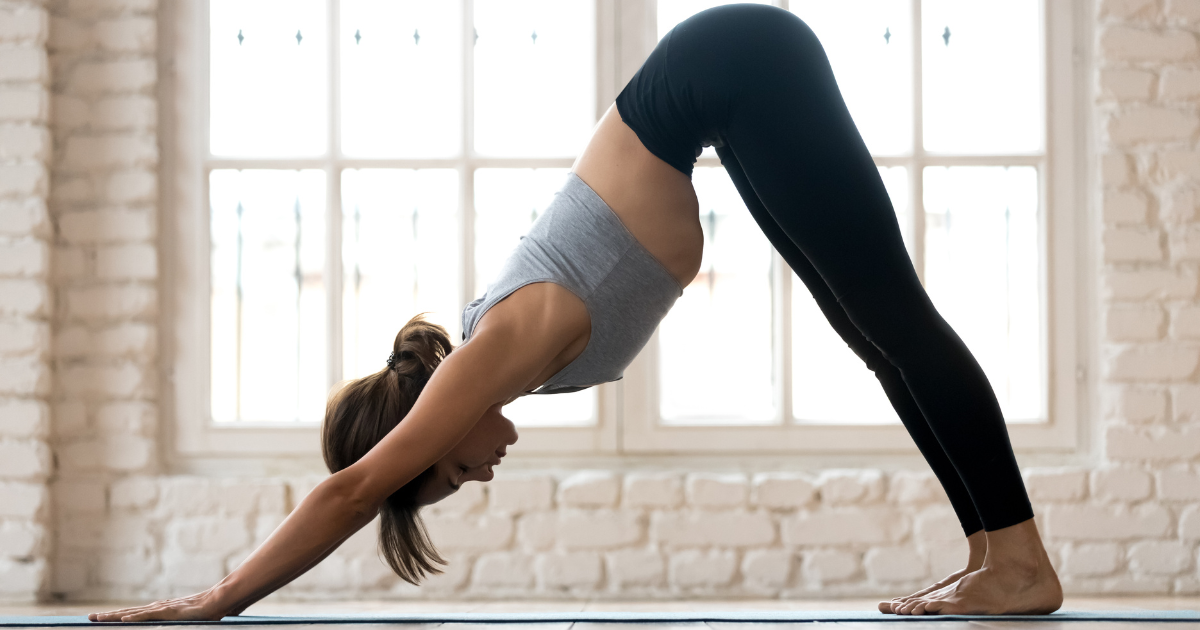
If you've ever stepped onto a yoga mat, chances are you've done Downward Facing Dog, also known as Adho Mukha Svanasana. It’s one of the most well-known yoga poses, but let’s be real—it’s not always as easy as it looks. Maybe your heels won’t touch the floor, your wrists feel sore, or you’re just not sure if you’re doing it right. I’ve been there too.
But here’s the good news: Downward Dog is a game-changer once you get the hang of it. It strengthens your body, stretches your muscles, and even helps calm your mind.
In this guide, I’ll walk you through everything you need to know—why it’s good for you, how to do it correctly, common mistakes, and simple fixes. By the end, you’ll feel more confident in your practice and actually enjoy this iconic pose. Let’s dive in!
Benefits of Downward Facing Dog

Downward Facing Dog isn’t just a transition pose—it’s a powerhouse for your body and mind. Whether you want to build strength, improve flexibility, or simply feel better after a long day, this pose delivers serious benefits.
- Strengthens your upper body. Holding this pose engages your shoulders, arms, and upper back, helping you build endurance and stability over time. It also activates your core, making it a great full-body strengthener.
- Stretches your hamstrings and calves. If you struggle with tight legs, Downward Dog is one of the best poses to open up your hamstrings, calves, and even your Achilles tendons. Over time, this can improve flexibility and reduce stiffness.
- Elongates your spine. This pose gently decompresses your spine, relieving tension from sitting all day and promoting better posture. It helps counteract the effects of hunching over screens.
- Boosts circulation. Since your heart is positioned slightly above your head, this mild inversion encourages better blood flow, delivering oxygen to your brain and refreshing your energy levels.
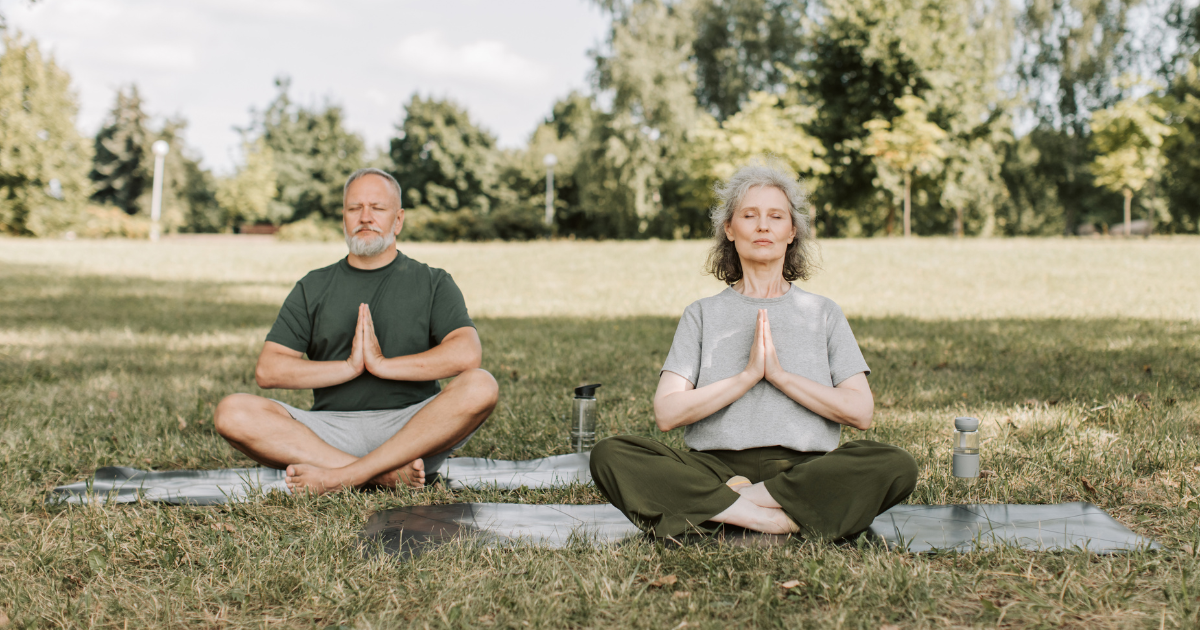
- Relieves stress and calms the mind. Downward Dog isn’t just for the body—it’s a great way to slow down, focus on your breath, and activate the parasympathetic nervous system, which helps reduce stress and anxiety.
What to Prepare for Downward Facing Dog
Before jumping into Downward Facing Dog, a little prep can make a big difference. The right setup helps you feel more comfortable and prevents unnecessary strain.
Start with a good yoga mat—one with enough grip to keep your hands and feet from sliding. If you have sensitive wrists, a folded towel or yoga wedge can provide extra support. Yoga blocks are also useful if you need modifications.
Warming up is key! Loosen up your wrists, shoulders, hamstrings, and calves with gentle stretches like wrist circles, cat-cow, and forward folds. If your legs feel extra tight, try a short walk or some ankle rolls before getting into position.
Finally, find a quiet space where you can focus, breathe deeply, and ease into the pose without distractions. Now, let’s get into the step-by-step guide!
Step-by-Step Instructions

- Start on all fours with your hands placed directly under your shoulders and your knees under your hips. Spread your fingers wide to create a stable base.
- Tuck your toes under and, on an exhale, push through your hands to lift your knees off the floor. Send your hips upward toward the ceiling, creating an inverted V shape with your body.
- Straighten your legs as much as comfortable while pressing your heels toward the ground. If your hamstrings feel tight, keep a slight bend in your knees.
- Lengthen your spine by reaching your tailbone upward while firmly pressing your hands into the mat. Focus on keeping your back straight rather than forcing your heels down.
- Let your head hang naturally between your arms, keeping your gaze toward your feet or the back of your mat. Avoid straining your neck.
- Draw your shoulder blades down and away from your ears to prevent unnecessary tension. Keep your arms strong but avoid locking your elbows.
- Hold the pose for five to ten breaths, maintaining a steady, controlled breathing pattern.
- When ready to exit, lower your knees back to the mat or transition into a resting pose like Child’s Pose.
Now that you know how to do it, let’s make sure you avoid common mistakes!
Common Mistakes and How to Fix Them
Even though Downward Facing Dog is a staple in yoga, it’s easy to make mistakes that can lead to discomfort or strain. The most common issue is rounding the spine, which happens when you don’t engage your core or lengthen through your back. Instead of forcing your heels down, focus on keeping your spine straight.
Another mistake is putting too much weight on your wrists, which can cause strain over time. To fix this, press firmly into your fingertips and distribute the weight evenly through your hands.
Many people also shrug their shoulders toward their ears, creating unnecessary tension. Instead, relax your shoulders and draw your shoulder blades down your back.
Lastly, if your knees are locked or hyperextended, you risk overstretching your joints. Keep a micro-bend in your knees, especially if your hamstrings feel tight.
By correcting these small mistakes, you’ll make Downward Dog feel more comfortable and effective in your practice!
Downward Dog Modifications and Variations
If Downward Facing Dog feels challenging, don’t worry—there are plenty of modifications and variations to make it more accessible or more advanced. Here are some options based on your needs.
1. Bent-Knee Downward Dog

If you have tight hamstrings or lower back tension, keep a slight bend in your knees instead of forcing your legs straight. This allows you to focus on lengthening your spine first before working on flexibility.
Best for: Beginners, people with tight hamstrings, or those recovering from lower back stiffness.
2. Elevated Hands (Wall or Blocks)

For those with wrist discomfort, place your hands on yoga blocks or against a wall instead of the floor. This reduces pressure on your wrists while still giving you the benefits of the pose.
Best for: Anyone with wrist pain, beginners, or those working on shoulder mobility.
3. Puppy Pose (Half Downward Dog)
If you struggle with full Downward Dog, try Puppy Pose by keeping your knees on the mat and stretching your arms forward. It helps open up your shoulders and spine with less strain.
Best for: Those with limited flexibility, shoulder tightness, or back pain.
4. Three-Legged Downward Dog

To build strength and balance, lift one leg straight up while keeping your hips squared. This variation challenges your core and adds a dynamic element to your practice.
Best for: Intermediate to advanced yogis looking to improve strength, stability, and coordination.
5. Twisting Downward Dog

For a deeper spinal stretch, reach one hand toward the opposite ankle while keeping the other arm grounded. This variation improves flexibility and helps release tension in the back.
Best for: Those wanting to increase spinal mobility and stretch their back muscles.
6. Chair Downward Dog
If you have mobility issues or trouble bearing weight on your hands, place your hands on the back of a chair and step back until your body forms an L-shape. This makes the pose more accessible while still stretching the shoulders and spine.
Best for: Seniors, individuals with mobility challenges, or anyone recovering from injury.
Try these variations based on what your body needs, and adjust as you progress in your practice!
Risks and Precautions
While Downward Facing Dog is generally safe, it’s important to be mindful of certain risks, especially if you have existing injuries or conditions. If you experience wrist pain, avoid dumping too much weight into your hands—spread your fingers wide and press through your fingertips to reduce strain. Using yoga blocks or a wedge under your palms can also help.
If you have tight hamstrings or lower back pain, forcing your heels down or locking your knees can cause discomfort. Instead, keep a slight bend in your knees and focus on lengthening your spine first.
People with high blood pressure, glaucoma, or vertigo should be cautious, as this pose involves an inversion that may cause dizziness or increased pressure in the head. If you feel lightheaded, take a break or try a modification like Puppy Pose.
Always listen to your body—if something feels off, adjust the pose or skip it. Yoga should feel good, not painful!
Downward Facing Dog FAQs
What is Downward Dog in yoga good for?
Downward Dog strengthens your upper body, stretches your hamstrings and calves, elongates the spine, and improves circulation. It also helps relieve stress and tension, making it both a physical and mental reset.
Who should avoid Downward Facing Dog?
People with wrist injuries, high blood pressure, glaucoma, or vertigo should be cautious or modify the pose. If you have shoulder, back, or hamstring injuries, consult a professional or use a supported variation like Chair Downward Dog.
How long should you hold a Downward Facing Dog?
Hold the pose for 5 to 10 breaths or about 30 seconds to a minute. Beginners can start with shorter holds and gradually increase as they build strength and flexibility.
What are the disadvantages of Downward Dog pose?
While beneficial, the pose can strain the wrists, shoulders, and hamstrings if done incorrectly. It can also cause dizziness in those sensitive to inversions. Proper alignment and modifications can help avoid these issues.
Can beginners do Downward Dog?
Yes! Beginners can start with bent knees, use props like yoga blocks, or try a modified version like Puppy Pose to make it more accessible while building strength and flexibility.
The Bottom Line
Downward Facing Dog is more than just a yoga pose—it’s a full-body reset that strengthens, stretches, and calms the mind. While it might feel challenging at first, focusing on proper alignment, avoiding common mistakes, and using modifications can make it more comfortable and effective.
The key is to listen to your body and progress at your own pace. Whether you're looking to improve flexibility, relieve tension, or simply refine your practice, Downward Dog is a foundational pose worth mastering.
Here’s the key takeaways for you:
- Downward Dog builds strength, improves flexibility, and promotes relaxation.
- Proper form is more important than forcing your heels to the ground.
- Modifications like bent knees or elevated hands can make the pose more accessible.
- Avoid common mistakes like rounded spine or excessive weight on the wrists.
- Practice regularly, but adjust or skip the pose if it causes discomfort.
Keep practicing, and soon, Downward Dog will feel like second nature!